# 標準で用意されたビットマップ使う pack [button .b -bitmap info -foreground red] # XBM形式のビットマップ・ファイルを使う pack [button .b -bitmap @foo.xbm -foreground blue] |
標準で用意されたビットマップです。

XBM形式のビットマップをイメージとして扱う時は、Widgetの-imageオプションを使います。
image create bitmap foo -file data.xbm -maskfile mask.xbm pack [button .b -image foo] |
フォトのボタンです。
image create photo foo -file foo.gif pack [button .b -image foo] |
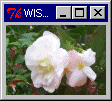
フォトをキャンバスWidget内に張り付けます。

pack [canvas .can -width 100 -height 70] image create photo foo -file hana.gif .can create image 0 0 -image foo -anchor nw |
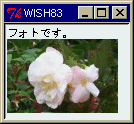
フォトをテキストWidget内に張り付けます。

pack [text .text -width 20 -height 7] image create photo foo -file hana.gif .text insert end フォトです。\n .text image create insert -image foo -name bar |
フォトに対しては、ガンマ値調整、拡大/縮小、ディザ、保存ができます。
保存ができるということは、画像形式の変換が可能ということです。
# ガンマ値の調整 image create photo foo -file hana.gif -gamma 1.4 # 2倍の拡大 image create photo foo -file hana.gif image create photo bar bar copy foo -zoom 2 # 1/2倍の縮小 image create photo foo -file hana.gif image create photo bar bar copy foo -subsample 2 # ディザ image create photo foo -file hana.gif foo redither # 保存(GIF to PPM変換) image create photo foo -file hana.gif foo write hana.ppm -format ppm |
その他、ピクセル単位の修正とコピーを応用すると 色々なことができそうです。
# 画像サイズの取得
proc getsize {image} {
    return "[image width $image] [image height $image]"
}

# 上下反転
proc hl_Invert {src dest} {
    set size [getsize $src]
    set x [lindex $size 0]
    set y [expr [lindex $size 1] -1]
    for {set srcy $y;set desty 0} {$desty <= $y} {incr srcy -1;incr desty} {
	catch {$dest copy $src -from 0 $srcy $x [expr $srcy+1] -to 0 $desty}
    }
}

# 左右反転
proc lr_Invert {src dest} {
    set size [getsize $src]
    set x [expr [lindex $size 0] -1]
    set y [lindex $size 1]
    for {set srcx $x;set destx 0} {$destx <= $x} {incr srcx -1;incr destx} {
	catch {$dest copy $src -from $srcx 0 [expr $srcx+1] $y  -to $destx 0}
    }
}

# RGB値反転
proc rgb_Invert {src dest} {
    set size [getsize $src]
    set x [lindex $size 0]
    set y [lindex $size 1]
    for {set iy 0} {$iy < $y} {incr iy} {
    	for {set ix 0} {$ix < $x} {incr ix} {
	    set rgb [$src get $ix $iy]
	    set color [format #%02X%02X%02X [lindex $rgb 2] [lindex $rgb 1] [lindex $rgb 0]]
	    $dest put $color -to $ix $iy [expr $ix+1] [expr $iy+1]
	}
    }
}
|
ボタンのカーソルを砂時計に変更する例です。
ボタン上にマウスカーソルを持っていくとカーソルが砂時計になります。
pack [button .b -text Push -cursor watch] |
カーソルの種類です。
arrow based_arrow_down based_arrow_up boat bogosity bottom_left_corner bottom_right_corner bottom_side bottom_tee box_spiral center_ptr circle clock coffee_mug cross cross_reverse crosshair diamond_cross dot dotbox double_arrow draft_large draft_small draped_box exchange fleur gobbler gumby hand1 hand2 heart icon iron_cross left_ptr left_side left_tee leftbutton ll_angle lr_angle man middlebutton mouse pencil pirate plus question_arrow right_ptr right_side right_tee rightbutton rtl_logo sailboat sb_down_arrow sb_h_double_arrow sb_left_arrow sb_right_arrow sb_up_arrow sb_v_double_arrow shuttle sizing spider spraycan star target tcross top_left_arrow top_left_corner top_right_corner top_side top_tee trek ul_angle umbrella ur_angle watch xterm |