| Widget名 | 水平(x軸方向) | 垂直(y軸方向) |
|---|---|---|
| canvas | ○ | ○ |
| entry | ○ | × |
| listbox | ○ | ○ |
| text | ○ | ○ |
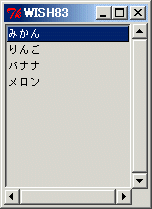
pack [frame .f] -fill both -expand 1

listbox .f.lst -xscrollcommand {.f.x set} -yscrollcommand {.f.y set}
scrollbar .f.x -command {.f.lst xview} -orient horizontal
scrollbar .f.y -command {.f.lst yview} -orient vertical

grid .f.lst .f.y -sticky news
grid .f.x -sticky news
grid rowconfigure .f 0 -weight 1
grid columnconfigure .f 0 -weight 1

.f.lst insert end みかん りんご バナナ メロン
.f.lst selection set 0
|

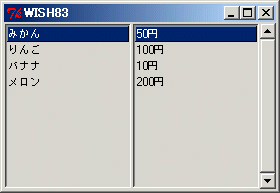
pack [frame .f] -fill both -expand 1

set BOXES [list .f.lst1 .f.lst2]

proc LBset args {
    global BOXES
    foreach lb $BOXES { eval $lb $args }
}

proc LBselect {sellist} {
    global BOXES
    foreach lb $BOXES {
	$lb selection clear 0 end
	foreach item $sellist {
	    $lb selection set $item
	}
    }
}

proc LBscroll args {
    eval .f.y set $args
    LBset yview moveto [lindex $args 0]
}

listbox .f.lst1 -yscrollcommand LBscroll -exportselection no
listbox .f.lst2 -yscrollcommand LBscroll -exportselection no
scrollbar .f.y -command {LBset yview} -orient vertical

foreach lb $BOXES {
    bind $lb <<ListboxSelect>> {
        LBselect [%W curselection]
    }
}

grid .f.lst1 .f.lst2 .f.y -sticky news
grid rowconfigure .f 0 -weight 1
grid columnconfigure .f 0 -weight 1
grid rowconfigure .f 0 -weight 1
grid columnconfigure .f 1 -weight 1

.f.lst1 insert end みかん りんご バナナ メロン
.f.lst2 insert end 50円 100円 10円 200円
.f.lst1 selection set 0
.f.lst2 selection set 0
|

proc LBscroll {scrollbar geoCmd offset size} {
    if {$offset != 0.0 || $size != 1.0} {
        eval $geoCmd
       $scrollbar set $offset $size
    } else {
        grid forget $scrollbar
    }
}

pack [frame .f] -fill both -expand 1

listbox .f.lst \
    -xscrollcommand {LBscroll .f.x \
        {grid .f.x -row 1 -column 0 -sticky we}} \
    -yscrollcommand {LBscroll .f.y \
        {grid .f.y -row 0 -column 1 -sticky ns}}
scrollbar .f.x -command {.f.lst xview} -orient horizontal
scrollbar .f.y -command {.f.lst yview} -orient vertical

grid .f.lst .f.y -sticky news
grid .f.x -sticky news
grid rowconfigure .f 0 -weight 1
grid columnconfigure .f 0 -weight 1

.f.lst insert end みかん りんご バナナ メロン
.f.lst selection set 0
|

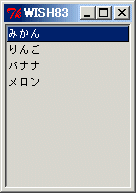
pack [frame .f] -fill both -expand 1

listbox .f.lst -xscrollcommand {.f.x set} -yscrollcommand {.f.y set}
scrollbar .f.x -command {.f.lst xview} -orient horizontal
scrollbar .f.y -command {.f.lst yview} -orient vertical

grid .f.lst .f.y -sticky news
grid .f.x -sticky news
grid rowconfigure .f 0 -weight 1
grid columnconfigure .f 0 -weight 1

.f.lst insert end みかん りんご バナナ メロン
.f.lst selection set 0

bind .f.lst <1> {
    focus .f.lst
}
focus .f.lst
|